
Manually create IAM Role
Go to the console menu and select IAM.

Click on Policies and create a Policy with the following permissions:
{
    "Version": "2012-10-17",
    "Statement": [
        {
            "Effect": "Allow",
            "Action": "ec2-instance-connect:SendSSHPublicKey",
            "Resource": "*",
            "Condition": {
                "StringEquals": {
                    "ec2:osuser": "deltaxml"
                }
            }
        },
        {
            "Effect": "Allow",
            "Action": "ec2:DescribeInstances",
            "Resource": "*"
        }
    ]
}Note: This policy is set for all resources to begin with, once you’ve got everything set up it would be more secure to add a line specifying the AMI directly to restrict the access of the AMI Policy.
   "Resource": [
                "arn:aws:ec2:region:account-id:instance/%instanceid%"
            ],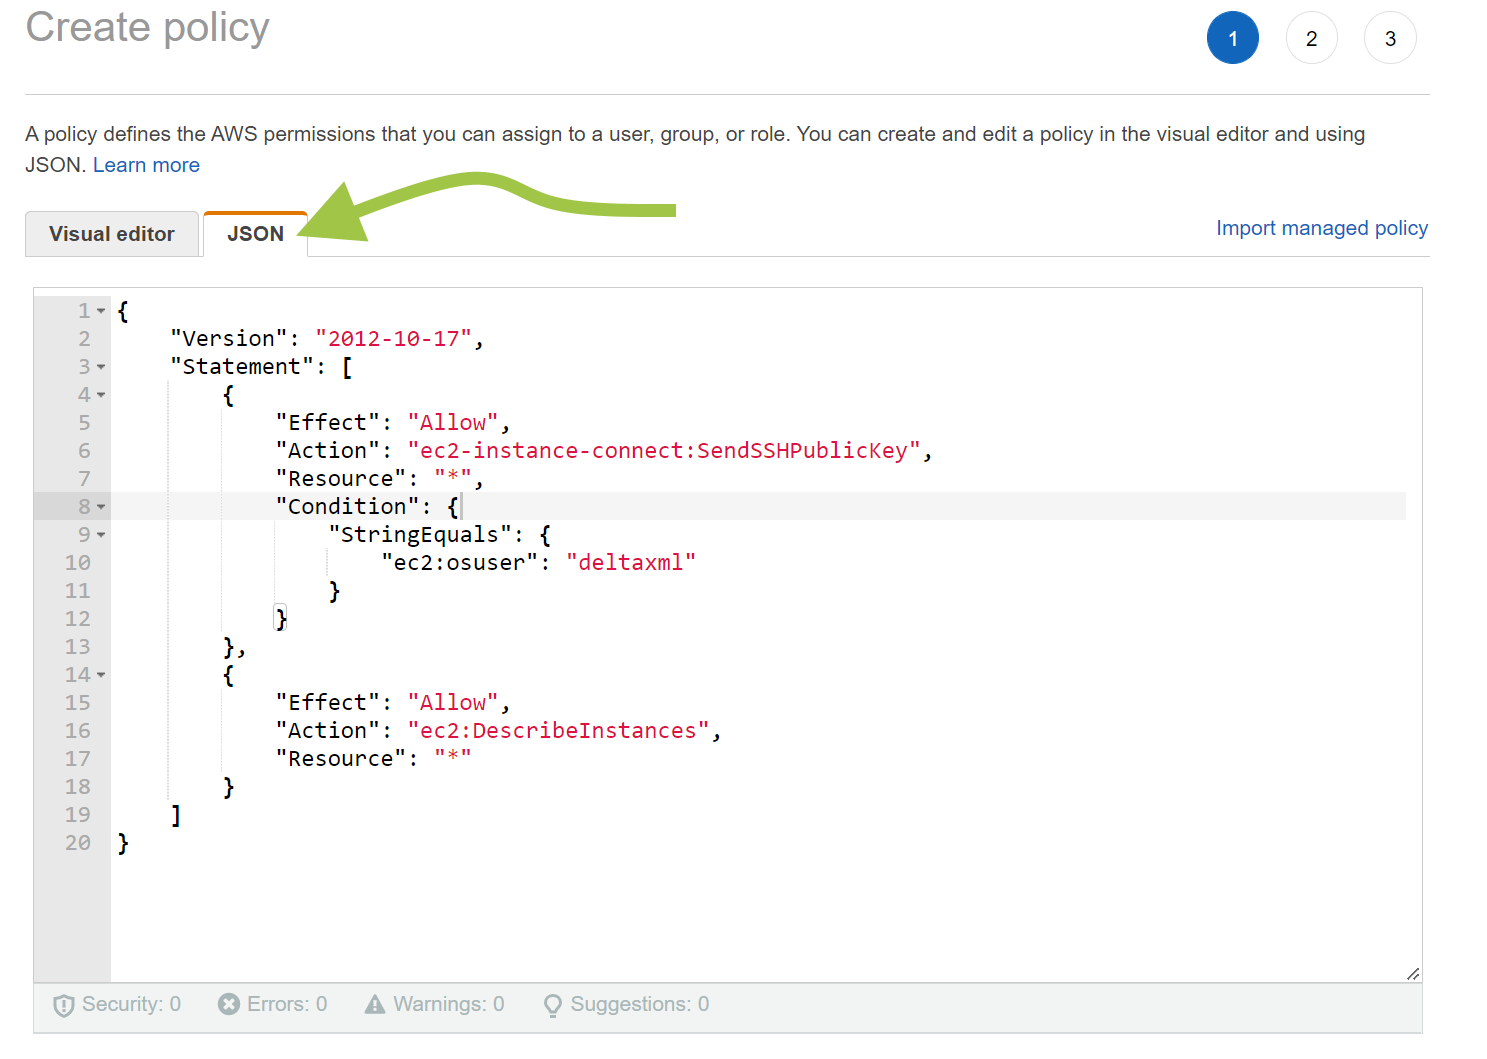
Enter the policy directly into the JSON Editor
Name the Policy “DeltaXML-AMI-Policy” and Finish the Creation.
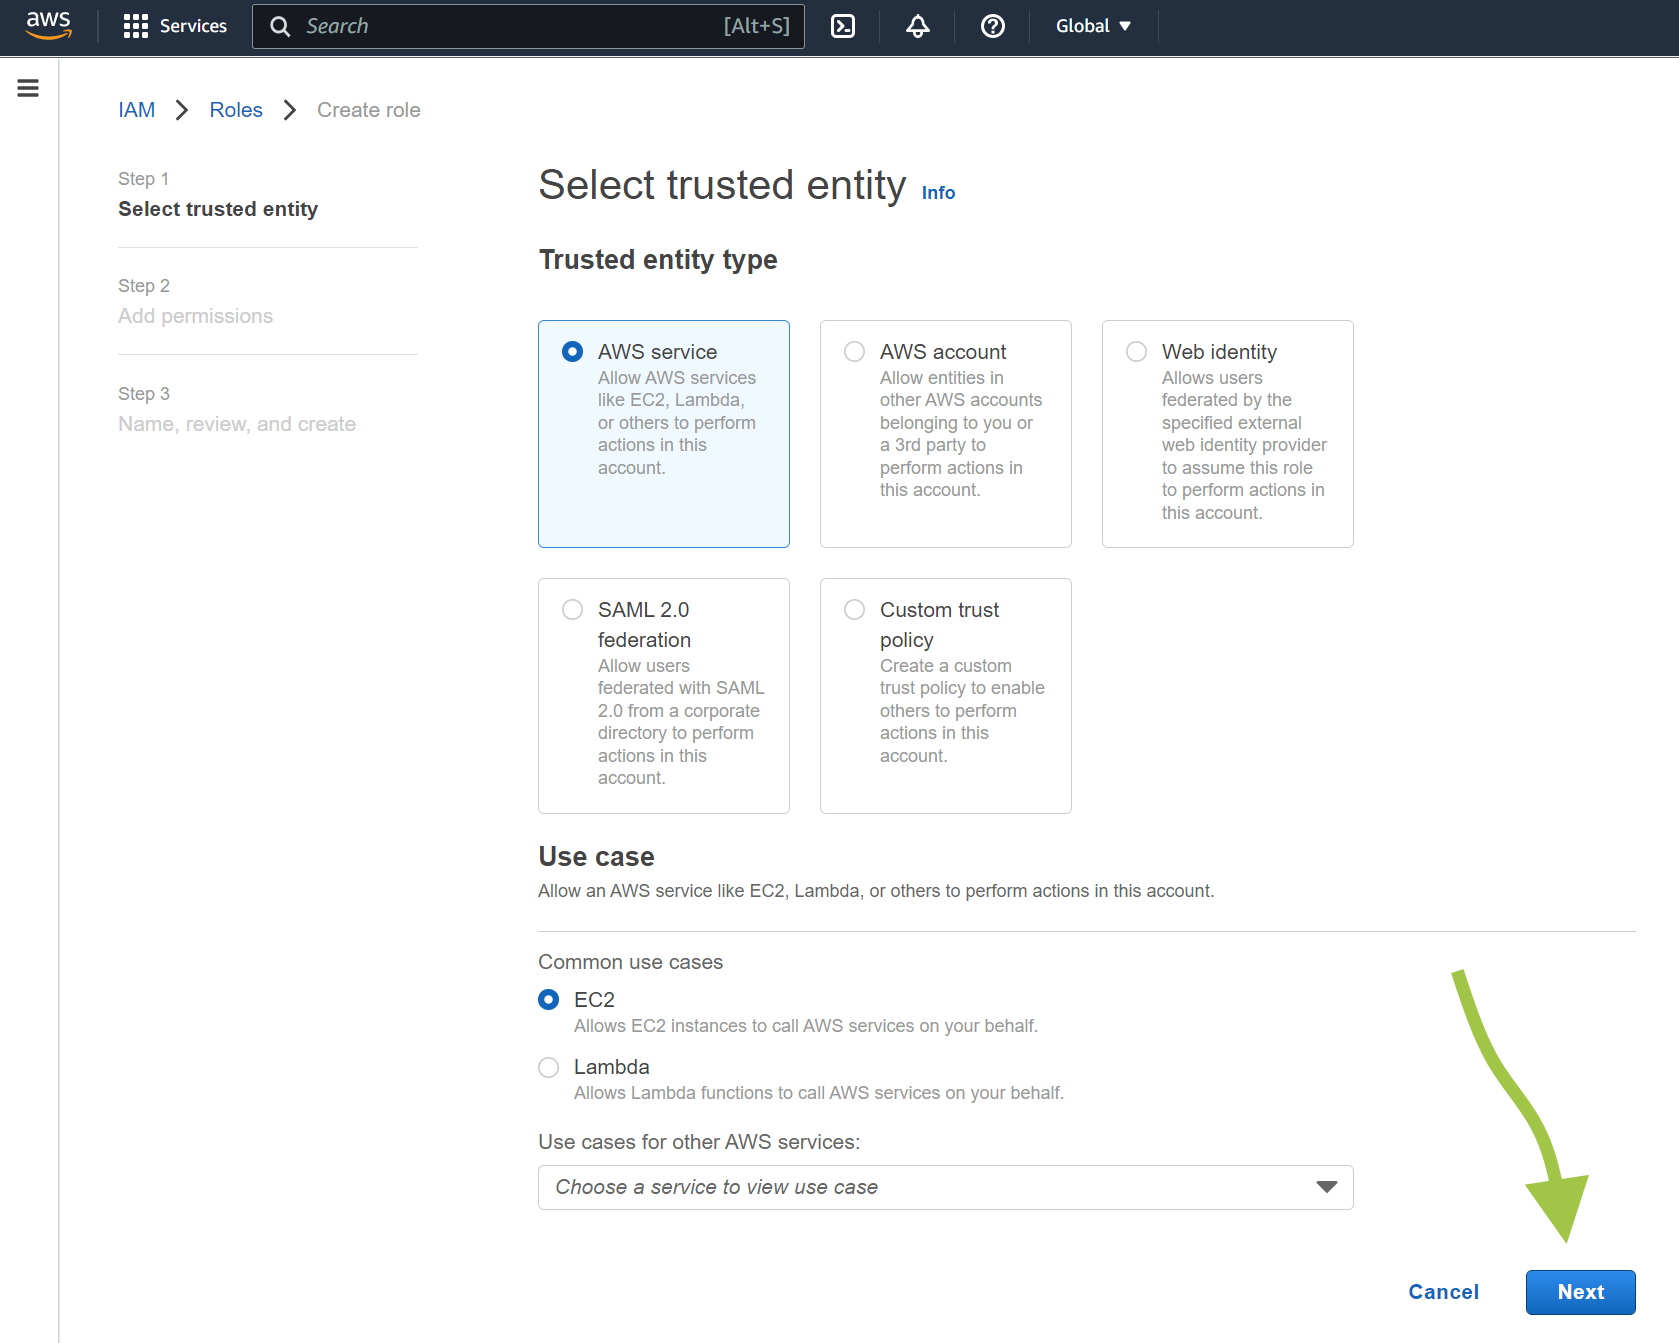
Now click on “Roles” and Select “Create Role”
Select AWS Service and at the bottom of the page choose “EC2” and click Next
On the next screen, find the policy created above in the list, and make sure it is checked. Also find AmazonSSMManagedInstanceCore and CloudWatchAgentServerPolicy policies and put a check in them, then click Next
Give the Role a name, we would suggest “DeltaXML-AMI-Role”
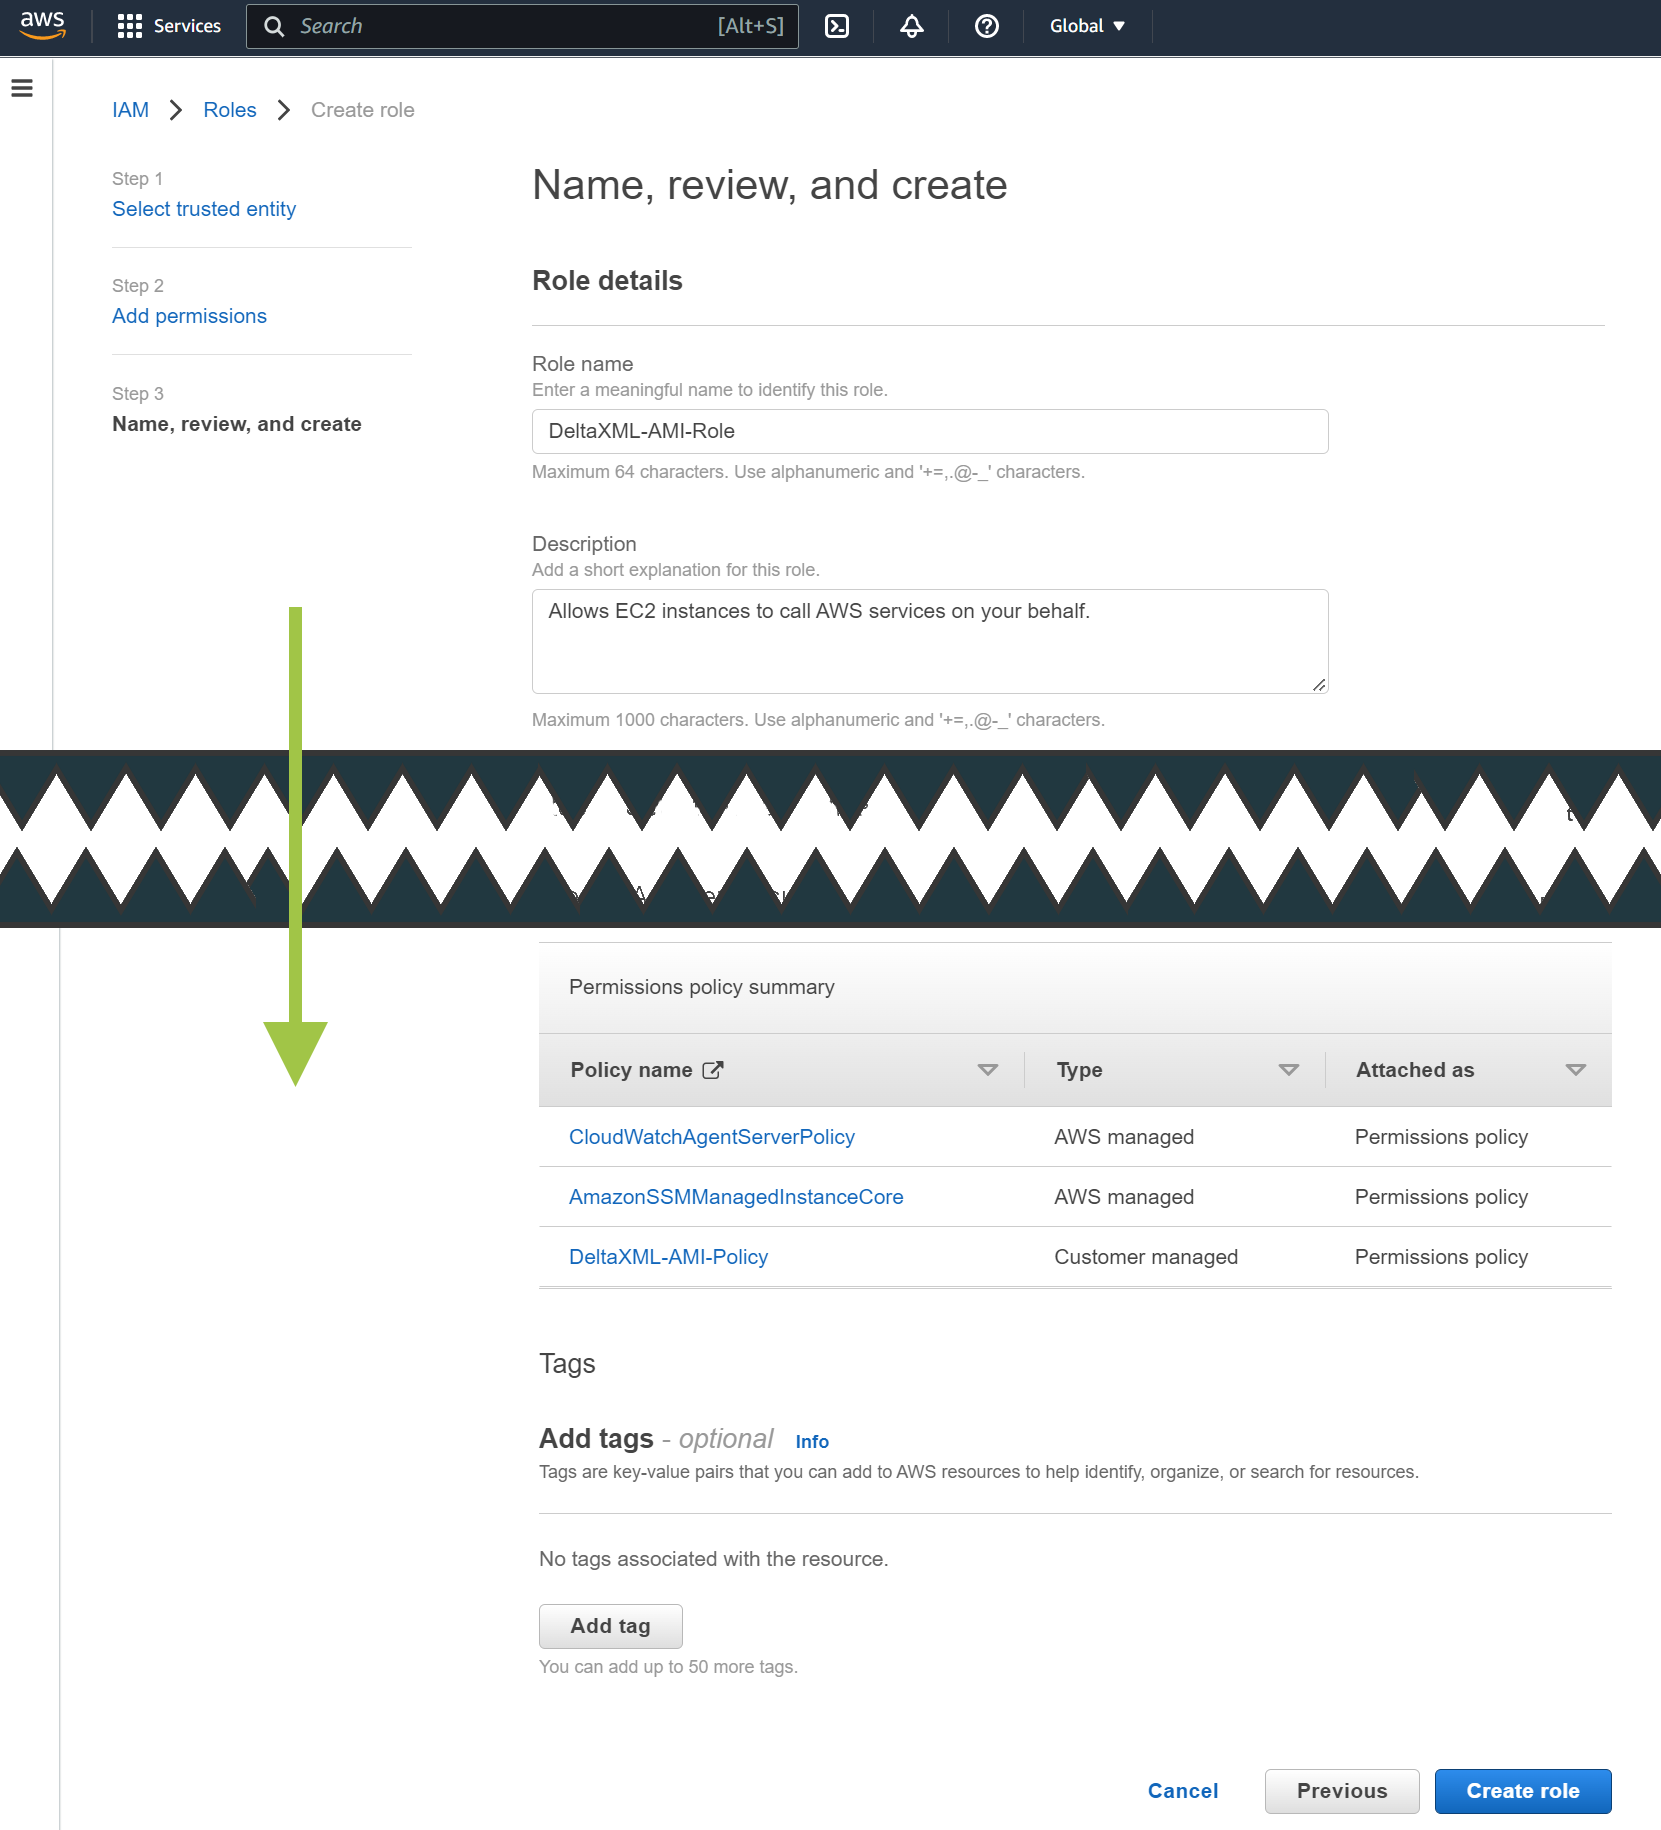
Click on “Create Role”
Now you can continue to Setup your AWS EC2 Instance (Linux)